Before creating my ident, I sketched a rough plan as an idea of what it could look like. I took inspiration from various fonts on DaFont.com. I decided to try a glitch-effect font as I feel this aligns could allude to the idea that things aren't as they seem, which would link to the idea that the protagonist is in two roles, one as a criminal and one helping the police. Initially, I was considering putting the text within a box due to the title being 'Inside', this also links the ident with the themes of the show such as mental health.
Process:
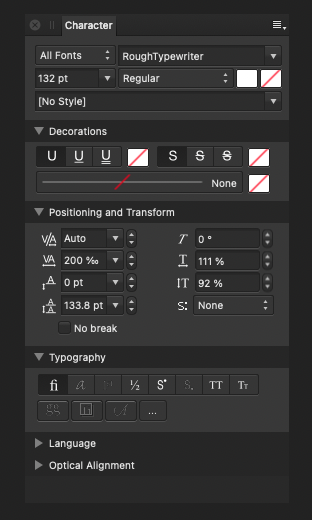
First, I downloaded the font 'Bad Signal' from DaFont.com to use as my ident, it is free for personal use so I will give credit to the creator and pay any necessary fee in order to use it commercially. I then opened a new Affinity Designer document with a transparent background and inserted the title 'Inside' with the downloaded font. I adjusted the spacing and sizes of the letters using the control panel. I decided to offset some of the letters' heights in order to create further interest.
Next, I began adding colour to my text. I used the gradient effect to create a unique style, I chose the colours green, blue, purple and pink in bright shades so that my ident will be memorable and stand out. The general aesthetic of my show, as well as many typical crime dramas, is quite dark and gloomy so I wanted to use a mixture of bright colours to stand out. Furthermore, blue is commonly associated with the sea which will be a running symbol within my show and green is linked with mental health so I wanted to include these colours. Initially, I used the gradient effect on all of the text together but I found it was too linear for what I wanted so I switched to each individual letter by changing the layer to a vector. Once I was happy with the colour I re-merged the text and tested some other effects. I decided to add a light shadow to the text as I feel this further brings out the bright colours.
Exporting:
Finally, I exported my ident as two separate files. One was an SVG file which had a transparent background and I also exported a PNG with a white background. The transparent version will be useful for creating other components such as the poster and the white background can be used on it's own as a logo for the show.
I have created a visualisation diagram for each social media post I intend to produce. I have chosen to make 2 Instagram posts and one Twitter post. For each one I have annotated the size in pixels and some extra details on what the posts will look like and what the captions/text will be.
I have produced a visualisation diagram for my poster, it is an initial plan for what it will look like. I have annotated to add more detail to the idea, including information such as colours, fonts and sizes. I have also added the typical dimensions of a bus stop poster (40" x 60") as this is what I intend to produce.
I have produced a script for my TV trailer which includes the dialogue included as well as a brief description of the scenes. I have conformed to script conventions by capitalising the first mention of a character, having descriptions in present tense and having camera instructions such as spinning.
Storyboard:
Following the script, I produced a storyboard to illustrate each scene and develop some more details before filming. For each scene I have included shot lengths, types and camera angles and movements. Lastly there is short description of what will be happening in each scene to go along with the drawings.
Consent form:
As I will play the character in the trailer, I have signed a consent form to give my approval to appear in the video. I will also ask for permission from the owner of the location I am using for filming (the owner of the house).
Risk Assessment:
I have carried out a risk assessment to ensure the safety of the cast and crew involved in filming. I assessed the locations I will use to film and noted down any potential risks and how these could be overcome.
Callsheet:
Lastly, I have produced a callsheet for the day of filming. This is to inform anyone involved of the details of the shoot so it can run smoothly, including information such as timings and any specific instructions.
To create the images for the posts, I took screenshots from the TV trailer and repurposed them for social media. I used Affinity Designer to resize the images and add in the BBC Three and BBC iPlayer logos as this gives further publicity for where the show will be released. For the landscape image I resized it to be 1080 x 566 pixels and the square image to be 1080 x 1080 pixels. I also decided to repurpose my poster for Instagram so I saved a new version and changed the size to 1080 x 1350 pixels. Then I adjusted the components to fit the new size, I removed the white circle as it took up too much of the space. After exporting my adjusted images I used the website 'zeoob' to produce the appearance of posts. I made two Instagram posts using the ocean image and the poster. I gave the ocean post the caption 'Where do you go to escape?', this is because I wanted my social media posts to encourage discussion among the audience so by asking a question it gives them the opportunity to share their stories. I added some hashtags which I also used as the caption for the poster along with the release date, this gives consistency across the social media campaign. The hashtags include the show's tagline and title as people can then use them to see other content related to the show. I then used the knife image as a twitter post with the caption 'Coming Soon...' and the same hashtags. This will build excitement for the show as it doesn't give away any information but it can start a discussion on what it could be about.
I decided to re-purpose my TV trailer for social media, similarly to the poster I created a copy of the trailer in Final Cut Pro and resized it so it to be portrait for Instagram. I then went through and adjusted each scene so that it fit in the frame and kept the main elements visible. When exporting this version, I used the video codec H.262 and resolution 1080 x 1350 as it is portrait rather than landscape. It is 25fps and stereo 48kHz to meet industry standards.
I created a new print canvas in Affinity Designer in size A0 (as it will be large for the bus stop advertisement) and started with a plain black background. The first element I added was the ident I previously created which I resized and placed at the top of the poster. I then sourced an image of a boy curled up in a ball as this was my initial main idea for the poster. I used the website remove.bg to remove the background and placed the edited image into the centre of the poster. I slightly lowered the saturation of the image to make it suit the gloomy theme I wanted to create. Next I added a white circle graphic behind the boy to create the idea of it being a spotlight which is highlighting that he is the focus of the show. I added an outer glow effect to the circle to make it look brighter. I then added in text which states the release date of the show and its tagline. For this I wanted to use a typewriter style font so I downloaded one from dafont.com. I used white text so that it is clear against the dark background and matches the dull colour scheme (further making the ident stand out). I added in the BBC iPlayer and BBCThree logos to meet the conventions of BBC posters and to clearly show where it can be accessed. Lastly, I decided to add in an image of the ocean as an overlay at the top of the poster because this is an important recurring image in the show. Initially I wasn't happy with the colour of the image so I used the colour overlay effect in bright blue. I then reduced the opacity of the image to make it appear as though it is blending into the background.
Exporting:
I exported the final poster as a high resolution (300dpi) PNG in order for it to be suitable for print. It is 9934 x 14044 pixels so that it can be used for a bus stop advertisement.
The first stage of production was to source the assets to be used for the radio trailer. I generated the speech clips using an AI, I used one male voice for the dialogue and a female voice for the end narration. I then chose to use the song Vienna by Billy Joel in order to create a dramatic feeling. After searching YouTube I found an instrumental version. Lastly I used the BBC's sound effects website to source a range of potential sounds. I created a folder on my desktop and imported the material. I then opened Final Cut Pro and created a new library called Unit 20 Advertising and a project titled Radio Trailer, I set the stereo audio to 48kHz as this is the broadcasting standard.
I chose a 45 second segment of the music to use and imported this into the timeline. I then added the dialogue which I cut down into individual lines and spaced them out. I adjusted the timings to match with the speed and intensity of the music. Next, I added in sound effects, this included a police siren, footsteps and knocks on a door. I inserted each sound effect into the timeline and placed them in an order which created a sort of narrative for the audience to interpret. Once I had done this, I decided to add in some quiet atmosphere so that it sounded more natural and blended together.
Once I had all the elements in place, I adjusted the sound levels to meet industry standards (below -6db). I kept the dialogue louder than the other elements so that it is clear for the audience to hear. Using alt, I made the music quieter at times where dialogue or sound effects were used and louder when it was the only sound. I also added a fade in and out for the music as this is a convention of radio trailers. For each sound effect, I adjusted it based on how clear it needed to be. For the footsteps I wanted them to be subtle whereas the siren and door knocking was loud and intense. I then listened to the radio trailer all together to ensure I was happy with the final product and made any necessary adjustments.
Exporting:
I exported my final radio trailer as a WAV file with stereo 48kHz and a bit depth of 16. This is the industry standard meaning that it would be appropriate for BBC stations. I then exported a compressed video file as this is easier to embed across different platforms, this was an Mp4 file with the H.264 coding.
After producing the storyboard, I spent a day filming some scenes to be used in my trailer. I chose to use manual focus for some shots and auto for others, this was because I wanted to have control where possible however some shots involved me being in the frame instead of behind the camera. I set the shutter speed to 1/50 as it is conventional to edit in 25 frames per second. I chose ISO 400 because this is suitable for indoor filming. Lastly, I set the white balance to auto whilst inside, when outside I changed it to cloudy because this produced the best output.
I started by filming outside because it was forecast to rain so I needed to ensure I had chance to get these shots. The shots of the knife on the ground and the camera falling to the ground were filmed in the garden, I decided not to use the tripod as these were moving shots so I wanted to manually control the camera. I filmed multiple shots for each scene so that I had options when it came to editing. Next, I set up the tripod on the tallest height and panned it to face into an outdoor bin. I placed it in a position where only my hand was visible, this was because my protagonist is male so I needed to avoid it appearing otherwise. I filmed various shots of the bin opening and closing, some fast and others slow so that I could decide which was appropriate in post-production.
I then moved the equipment inside to film the remaining shots. Firstly, I shot the vegetable cutting scene using the knife from previously. Initially, I used an apple but this turned out harder than I imagined and after watching the clip back I decided to try something else. I tried using a cucumber and this was much more effective as it cut much easier and gave the desired effect. For these shots, I put the camera on a pile of books because I wanted it to be shot from a straight-on angle and the tripod was too tall. The next shot I needed was a birds-eye-view of a cup of coffee being poured, this was not part of my original plan but I added it in because I wanted more domestic shots to contrast the crime elements. I set up the camera on a low height and tilted it down towards the mug. I found that doing this created shadows of the tripod and camera so I adjusted it to an angle that avoided this. Again, I filmed multiple shots with the water being poured from slightly different angles. The final shot was the protagonist (played by me) looking out a window. First I filmed this in the kitchen but the lighting and background didn't match what I wanted to create. I tried another room upstairs which was much more effective, this shot needed to be filmed multiple times because I couldn't see where I needed to be stood so I gave myself a few options.
Due to the fact my show is a crime drama, I wasn't able to film all of the shots I wanted to include. I began sourcing clips from websites such as Pexels and Videvo, initially this was only the shots I had planned to include in my script and storyboard. However, I found it difficult to find certain shots so I browsed more options. When searching, I looked at videos related to crime themes to add to the montage. For each shot, I made a note of where I found them and put them into an asset table to record the copyright and legal issues. I then created a new folder on my desktop titled TV trailer and imported the footage.
Once all of the shots had been recorded and sourced, I created a new project in Final Cut Pro titled 'Inside TV Trailer' and imported the footage as well as the music and sound effects I used for my radio trailer. To ensure I met with industry standards, I used a 16:9 aspect ratio and resolution 1920 x 1080. As with the radio trailer, the audio is 48kHz.
Initially, I placed the same section of the music as the radio trailer and arranged the clips into order. I then decided to take out the music and adjust the length of each clip. One scene in the montage was a stopwatch with the time going up but I wanted it to be a countdown so I put the video in reverse. I also sped up the clip of the camera falling to 105% because I wanted to create the effect of someone falling and when filming I did it slowly to avoid damaging the camera. I then listened to the song and chose two separate parts to use with a slight gap in between because I wanted there to be a clear difference between the slow introduction and then fast paced montage. Once I chose the music I went back through the montage clips and made them match up with the beat of the song. I also decided to have the first clip of the ocean without the music and instead I sourced an ocean sound effect which I added in and made it fade out into the music fading in. I added in the same dialogue as the radio trailer, as the music was different the timing between each line was also slightly different. Similarly to the radio trailer, the dialogue and music needed to blend together better so I added the same atmosphere noises at a low volume.
After placing all of the elements, I then went through and made adjustments to the visuals and audio. I started by using alt to change the volume level of the music at different points. As I did for the radio trailer, I reduced the volume where dialogue was included and increased it for the montage as there was no other sound in this section. I ensured that the dialogue was clear and at an appropriate volume, to conform with industry standards the audio does not go above -6db. For the visual effects, I changed the saturation and exposure for each clip to give it an overall mise-en-scene which was focused around cool toned and mainly dark colours. As I had split some clips in half, such as the bin shot and camera falling to the ground, I used the colour balance tool to maintain continuity.
The final stage in producing my TV trailer was adding in an end screen and the BBC iPlayer animation. I wanted the end screen to be a video of a blue monarch butterfly flying across the screen because it is a symbol for mental health and this is a key theme in my show. I found an animation on YouTube which I downloaded and cut down. I then added my ident over the top and faded in titles with the release date of the show and the tagline. Lastly, I placed the iPlayer gfx after the end screen as this is a convention of BBC trailers.
Exporting:
I exported my final video in 1080p HD quality and a 1920 x 1080 resolution, these are key industry standards which need to be met for broadcasting on the BBC. I exported two final versions, one was a high quality master file and the other was a compressed H.264. The high quality file is used for the client whereas the compressed file can be used for YouTube and social media as it is smaller in size.
I produced a script for my radio trailer in order to plan what dialogue as well as music and sound effects will be needed. This is so that when it comes to producing the trailer I will have a clear idea of what assets I will need and how it will all come together.